🩺 How to Recover Lost Data From 4K Drives 💽
👍 In today’s video, we’ll be talking about 4K drives to find out what kind of hard disk drive is that, what advantages it has, and how to recover lost data from such storage devices.
Hopefully, this video was useful. Remember to click the Like button and subscribe to our channel. Push the bell button to receive notifications and never miss new videos. Leave comments to ask questions.
This and other videos you can watch on our YouTube channel:
How to Fix Damaged «Excel» or «Word» Files That Won’t Open?
Read this article to find out how to repair damaged Excel or Word files that won’t open because of an error or failure. How to restore access to a damaged document?

🍏 Recovering Data after Mac OS Update, Reinstall or Disk Format 🍏
👍 In this video, I’m going to show you how to recover data after you reinstalled or updated your MacOS, or after you have formatted the hard disk. From this video, you will learn how to recover data after you reinstalled or updated your MacOS, or after you have formatted the hard disk. Also, we will show you how to reinstall MacOS without losing any data at all.
Hopefully, this video was useful. Remember to click the Like button and subscribe to our channel. Push the bell button to receive notifications and never miss new videos. Leave comments to ask questions.
This and other videos you can watch on our YouTube channel:
How to Recover Data from a USB Flash Drive, Memory Card, Removable HDD in Linux With a Windows-Compatible Utility
If you’re facing a problem of data loss from Linux volumes with Ext4/3/2 file system try Hetman Partition Recovery. There are lots of data recovery tools you can use, but only some of them can offer support for Linux file systems. Hetman Partition Recovery will quickly scan your disk and display the available data on the screen, so you will only have to select the elements you need and recover them.

What to do If the Hard Disk is Recognized as RAW?
Sometimes happens, that after some time when you turn on your PC, it says the hard disk is not formatted, file system type is RAW, no files in sight, and you cannot copy anything from there. What should you do, then?
First of all, you shouldn’t panic, hurry or agree to Windows suggestions (unless you know 100% what certain operations do). The best thing would be to turn off your PC (if it occurred to an external hard disk – disconnect it from your PC or laptop).
Reasons why your file system appears to be RAW
RAW file system means that the disk is not formatted and there is no file system assigned to it. This may happen for a number of reasons but most often they are like this:
- A power cut while the PC is working (for example, when there is a power failure, and when the electricity is back again, you turn on the computer and it reboots; then you see that your disk has become RAW-type and you are offered to format it);
- talking about an external hard disk, it often happens to such devices when their USB cable becomes disconnected when some data is being copied (what we recommend: always, before disconnecting the cable, click on a tray icon (next to the clock) to remove the disk safely);
- in case of incorrect work with applications that modify hard disk partitions, format them and so on;
- very often, users connect their external hard disks to televisions which then format the disk into their own format which the PC cannot read and sees it as RAW file system (to read such disk you should better use special utilities that can read the file system that the television has created);
- when your PC is infected by viral applications;
- when the hardware is physically damaged (there is hardly anything you can do to save your data).
If the reason for RAW file system to appear is wrong disconnection of the disk (or a power failure/shutdown in an incorrect way in case with a PC) – then in most cases data can be recovered safely. In other cases, the chances are less but they are still there.
Case 1: Windows is loading, data on the disk is not necessary, the task is to restore operability of the drive
The easiest and quickest way to get rid of RAW is to format the hard disk into another file system (this is what Windows offers to do).
Attention! During formatting, all data will be deleted from the hard disk. Be careful not to use this method if you have important files on the disk.
It is better to format the disk from disk management system (“Computer” does not always show all disks, and in disk management system you will see the structure of all disks at once).
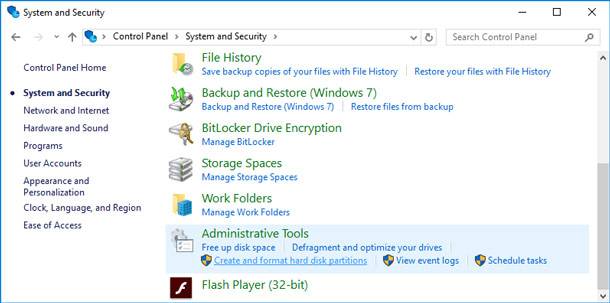
To open it, go to Windows Control Panel, then open System and Security, go to Administrative Tools and click the link Create and format hard disk partitions.
Then you select the disk having RAW file system, and format it (you just have to right-click on the necessary disk partition and select Format in the menu).

After formatting the disk will be as if new (containing no files) – now you can write to it whatever you need (and make sure it does not suffer a power failure again).
Case 2: Windows is booting (RAW file system is not in the disk containing Windows)
If you need the files which are on the disk – then it is strongly recommended that you don’t format the disk! At first try checking the disk for errors and correct it – in most cases the disk begins working as usual. Let’s study these actions step by step.
-
First of all, go to Disk Management (Control Panel/System and Security/Administrative Tools/Create and format hard disk partitions), see above in the article.
-
Remember the letter of the drive where you have RAW file system.
-
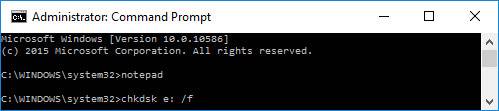
Launch Command Prompt as administrator. In Windows 10 it can be done easily: right-click on the START menu, and choose Command Prompt (Administrator) from the appearing menu.
-
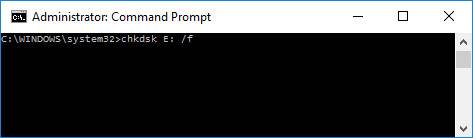
Then enter the command “chkdsk D: /f” (instead of D: – specify your drive letter) and press ENTER.
-
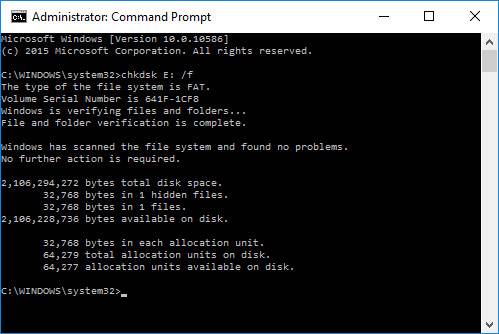
As you enter the command, the process of checking and correcting errors – if any are found – should begin. Quite often, after the checking Windows notifies you that all errors have been corrected and no further action is required. It means you can start working with the disk again, RAW file system has been replaced by your former file system (usually FAT 32 or NTFS).
Case 3: Windows does not boot (RAW is the file system in the disk containing Windows)
-
What to do if you don’t have a setup disk (flash drive) with Windows…
In this case, there is an easy way out: take the hard disk out of the computer (laptop) and put it into another computer. Then with the other computer you check it for errors (see above in the article) and if they are corrected, continue using the disk as before.
You can also use another variant: borrow a setup disk from someone and install Windows to another disk, then load from such disk and check for errors the one marked as being RAW.
-
If you have a setup disk…
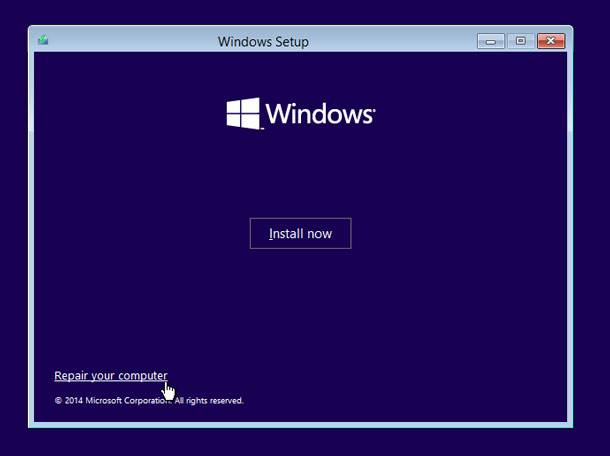
IThings are much simpler then. First of all, boot the PC from the setup disk and instead of installation, choose repairing (this link is always there in the lower left corner of the window when installation begins).
Then find Command prompt in the repair menu and launch it. There, you need to start checking of the hard disk where your Windows is installed. How can we do it – the drive letters have changed because we booted from a flash drive (a setup disk)? It’s quite easy:
- First of all launch the Notepad from the command prompt (command notepad and see what disks are there and what drive letters they have. Remember the drive letter of the disk where you have your Windows installed).
-
Then close the Notepad and launch the checking by the method you already know: chkdsk d: /f (and press ENTER).
By the way, usually the drive letter jumps one character ahead, i.e. if the system disk is C:, it becomes D: when you boot the system with a setup disk. Yet it doesn’t happen every time, so there may be exceptions to this rule!
If you need to save the lost data from a hard disk (or a flash drive) we recommend learning more about data recovery software.
Even if the computer does not boot, you can do as shown in Case 3. Take the hard disk out of the computer (laptop) and insert it into another computer. Using this other computer, scan it for lost data and if you find any, save it to another disk.
Source:
https://hetmanrecovery.com/recovery_news/what-to-do-if-the-hard-disk-is-recognized-as-raw.htm
Where Has The Free Space on Your HDD Gone?
It often happens that free space on your hard drive is growing less and less even when you don’t remember downloading any new files there. There can be various reasons for that but the first volume to suffer from free space shortage is your system disk C where your Windows operating system is installed.
Usually such loss of space is not connected to any malware or viruses. More often, Windows itself is the reason, because it tends to use any free space for a variety of purposes, such as storing backup setting copies (to enable restoring Windows in case of a failure), swap file, remaining junk files etc.
This article is going to deal with these causes and ways to eliminate them.
Searching For Big Files and Folders
This is the first issue to be faced in case of free space shortage. Certainly, you can try searching manually for the folders and files that take up the most space on your hard drive, but it can be long and ineffective.
Things look quite different when you apply special utilities to analyze the used space in your drive. There are many of them to help you find the folders and files that clog your precious space.
The usual culprits are most often as follows:
- system functions: system restore, page (swap) file;
- system folders containing various junk files (that nobody cared to clean for such a long time…);
- games installed and forgotten, that none of the computer’s users is going to play;
- folders with music, films, pictures and photos. By the way, so many users have hundreds of music and picture collections that contain duplicated files. It is recommended to delete such duplicates.
How can you eliminate the abovementioned problems?
Windows Restore Settings
Generally, having system backup copies is good, all the more when you sometimes have to use system restore points. Yet work becomes not too comfortable when such backups are beginning to take up more and more space on your hard disk: regularly, Windows would notify you that there is very little free space left on your system disk, and in addition, this can affect overall system performance.
To disable creation of system restore points (or limit the space they will take up on your HDD) in a Windows OS, go to Control Panel, select System and Security, then go to System tab.
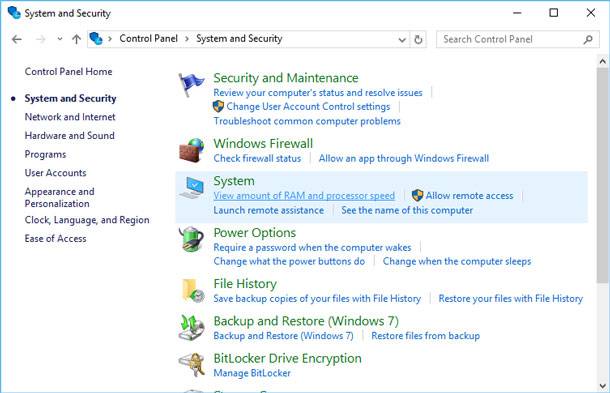
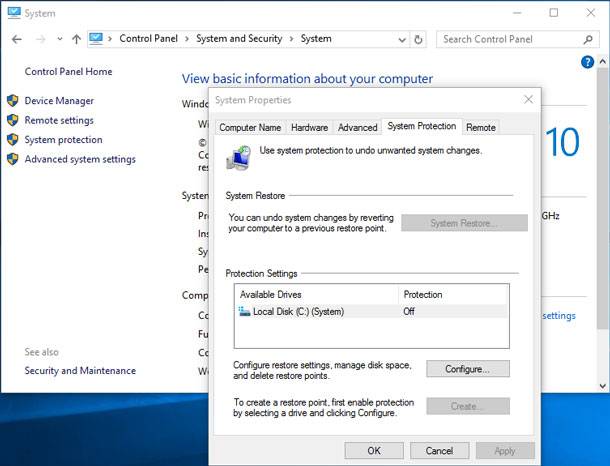
In the sidebar on the left, click “System Protection.” The window “System Properties” should appear.
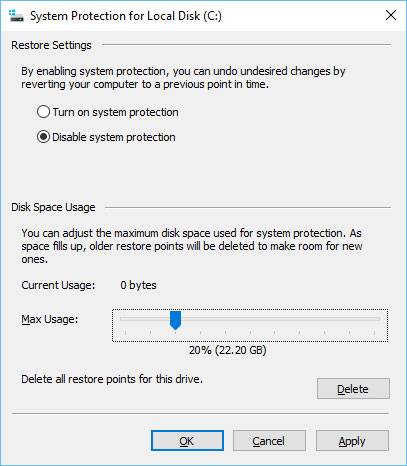
This is where you can set (by choosing a disk and clicking “Configure”) the amount of space allocated for system restore points. With the help of Configure and Delete buttons you can quickly reclaim more space in your hard drive and limit the number of megabytes allowed for restore functions.
By default, such operating systems as Windows 7, 8, 10 enable system restore points on the system disk and set the value of the space allowed for them about 20%. That is, if the volume of your system disk where you have installed the system is 100 GB, then about 20 GB will be allocated for restore points.
If there is not enough space on your HDD, it is recommended to move the slider to the left in order to reduce the amount of space allocated for system restore points.
Paging File (Swap File)
Paging file is a special area on the hard disk that your computer uses when it runs out of RAM – for example, when working with high-resolution video, graphic editors or playing resource-intensive games etc.
Naturally, reducing the size of this file may pull down your computer’s performance, but sometimes it is expedient to transfer the paging file to another hard disk or set its size manually. By the way, usually its recommended size is about twice as large as the size of your actual RAM installed.
To edit the paging file, go to Advanced tab (it can be found next to Windows restore settings). Click on the “Settings” next to Performance.
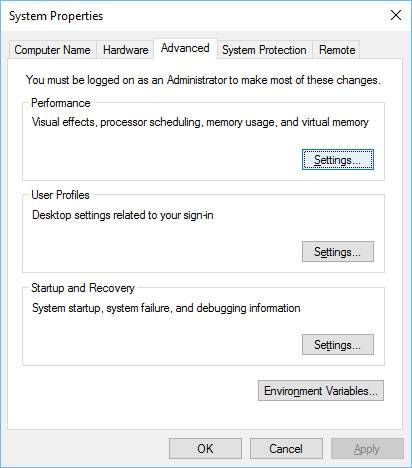
In the Performance Options window that opens select Advanced and click “Change”.
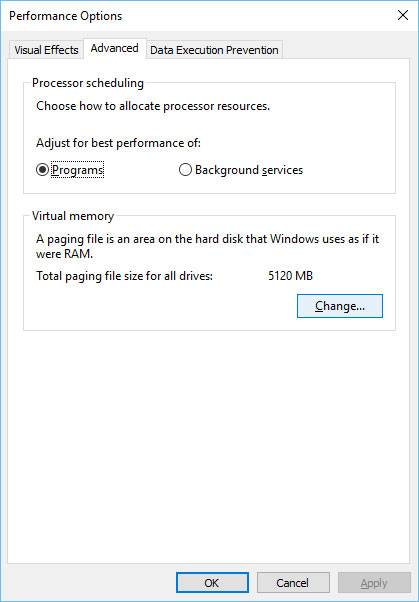
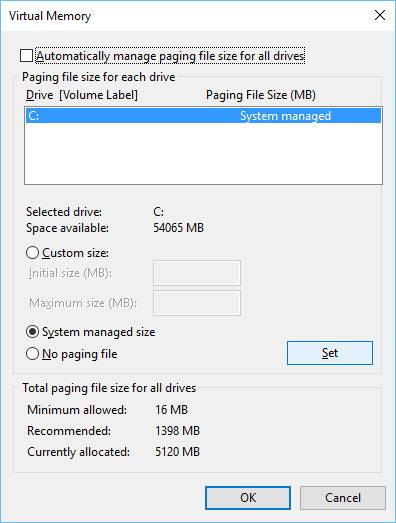
After that, uncheck the box “Automatically manage paging file size” and set its size manually. At the same time, you can specify the hard disk where the paging file should be located – it is recommended to have it on the other disk than your system disk (this can help to improve your computer’s performance a little). Then you should save the new settings and reboot your PC.
Deletion of Junk and Temporary Files
Such files are usually understood to be:
- Browser Cache. When you view web pages they are copied to your hard drive in order to enable quick download of frequently visited websites. It sounds reasonable to do without downloading the same elements again and again but just compare them with the authentic ones, and if everything is similar, they will be uploaded to memory from the disk instead of from the web.
- Temporary Files. Here are the folders with temporary files that take up most space:
C:\Windows\Temp
C:\Users\Administrator\AppData\Local\Temp (where “Administrator” is the name of the user’s account).
These folders can be cleaned as they store the files required for a program to work at a certain time: for example, during installation. - Various Log files and So On. Cleaning all this junk manually is neither quick nor easy. There are special utilities that make a quick and clean job of getting rid from all kinds of junk. I would like to recommend using them, from time to time.
Even antivirus software can eat away your precious space… First of all, check their settings, see what you have in the quarantine folder, log files etc. Sometimes there are many files infected by viruses and sent to the quarantine, and then the quarantine begins taking away so much space.
After all, antivirus software also has all kinds of log files, dumps etc. if space shortage is your problem, we recommend paying some attention to them as well…
In conclusion, we would like to add that before getting down to cleaning your hard disk, try to estimate how much free space you need and what files can be deleted without the risk of needing them in the future or affecting your work or overall system performance.
Keep in mind that the files deleted by both Windows standard tools and third-party cleaners do not go to the recycler, and therefore cannot be restored.
Yet if you find yourselves caught up in the cleaning process and suddenly face absence of necessary files, you can always use one of the file recovery programs.
Source: https://hetmanrecovery.com/recovery_news/where-has-the-free-space-on-your-hdd-gone.htm
Six Reasons Why Your External Drive May Get Slow
Nowadays it is more convenient to transfer films, games and other files with an external hard drive rather than with a flash drive or a DVD. In the first place, the copying speed is considerably higher, from 30-40 MB/s for an external disk versus 10 MB/s for a DVD). Secondly, you can write and erase information to a hard drive for as many times as you wish, and do it faster than you can with a DVD. Thirdly, with an external disk you can carry dozens and hundreds of various files. Capacity of modern external disks comes up to 2-6 TB and their small size allows carrying them just in your pocket.

However, sometimes an external drive may become slow, and for no obvious reason for that – nobody dropped it, hit it or put it underwater etc. What can be done in this case? Let us try and review all of the most widespread problems and their solutions.
Important! Before writing about the things that make your HDD slow down, I would like to say a couple of words on the speed of copying and writing information from an external disk. I will start with examples.
When you copy one big file the speed will much higher than with copying a number of small ones. For example, when you copy an AVI file of 2-3 Gb to the disk the speed may be ~20 Mb/s, and when dealing with a hundred of JPG pictures it will drop to 2-3 Mb/s. That is why it is better to compress the hundreds of pictures you have into an archive first and only then send them to another disk. In this case, the speed will not be so slow.
Cause No.1: It’s Been a Long Time Since You Run Disk Defragmentation + File System Check
Windows does not always place files on a disk in one big piece in one place. As a result, before getting access to a certain file, all those pieces have to be read, i.e. spend more time on reading the entire file. If there are more and more such pieces on your disk, then its performance and overall system performance will slow down. This process is known as fragmentation (in fact, things are not exactly that way but they are better to be explained in simple language to help every user understand the principle).
To improve the situation, a reverse process should be performed – defragmentation. Before launching it, clean the hard disk of junk (unnecessary and temporary files), close all resource-intensive applications (games, torrent clients, films etc).
How Can You Launch Defragmentation Of an External Disk?
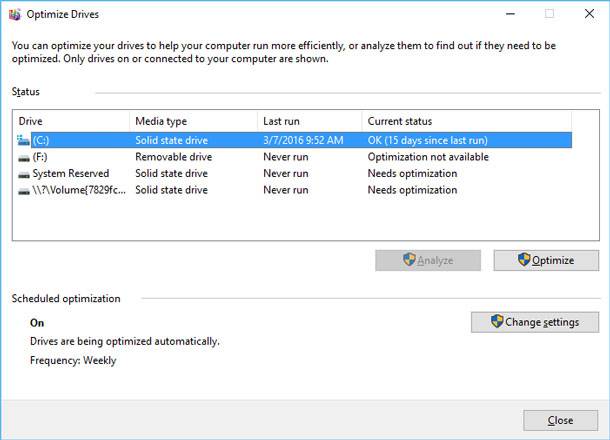
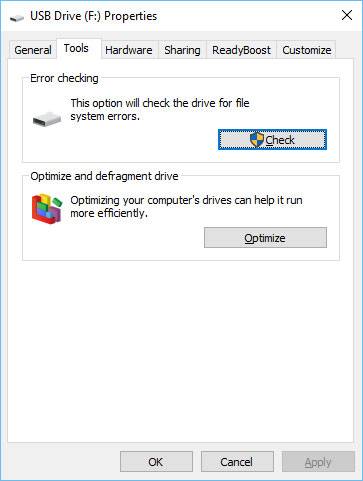
Go to Computer (or This computer, depending on your operating system version). Click the right mouse button on the necessary disk and go to its Properties. In this tab, open Tools and click Optimize.

In the window that appears, Windows will inform you on the status of disk fragmentationand if it needs to be defragmented.
File system can have a considerable influence on fragmentation (you can see its type in disk properties). For example, FAT 32 system (once very popular) does work a little faster than NTFS but is more vulnerable to fragmentation. Moreover, it does not allow placing files larger than 4 GB on the disk.
Cause No.2: Logic Errors, Bad Sectors
In general, you may not realize there are some errors on your disk because they can be accumulated for a long time without showing their presence in any way. Such errors most often emerge because of incorrect addressing of software, a conflict of drivers, sudden blackout (due to a power cut), or hang-up while the computer addresses the hard disk actively.
By the way, Windows often launches a utility to scan the disk for errors after rebooting (many of you could notice that when trying to switch on the computer after a blackout).
As to the external disk you’d better check it for errors with the help of Windows. To do so, go to Computer, then click the right mouse button on the disk and go to its Properties. The next step is to click Tools tab and select the function Check to examine the disk for file system errors.
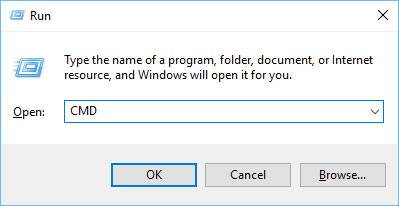
If the computer hangs up when you open Properties tab of the external disk, you can launch disk check from the command prompt. To do it, press the combination WIN+R, type in CMD and press Enter.
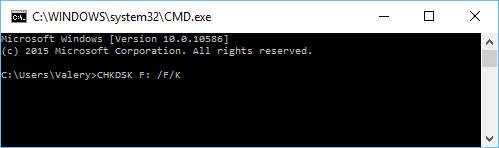
To check the disk, you should type in a command of the type: CHKDSK F: /F/R, where F: – the disk letter; /F/K – unconditional check with correction of all errors.
A couple of things about bad sectors
Bad sectors are the hard disk sectors that cannot be read. When there are too many of them in your hard disk the file system cannot isolate them without affecting the disk performance (and its operation in general).
Cause No.3: Several Applications Are Working With The Disk In an Active Mode
A very frequent reason for the disk to go slow – even if it is not external – is the heavy load.
For example, at the same time you may be downloading several torrent files to your disk, watching a film from the same disk and checking the same disk for viruses. Can you imagine the amount of hard work you have given to the disk? Quite naturally, it may start slowing down, especially if it is an external HDD (and to make things worse, it’s got no additional power supply).
The easiest way to see how loaded the disk is at the moment is to enter the task manager (by pressing CNTRL + ALT + DEL or CNTRL + SHIFT + ESC).
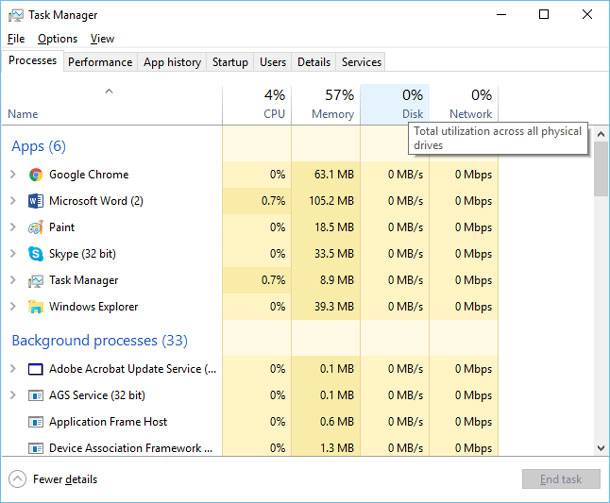
There may be some “hidden” processes to load the disk which you will never see without the task manager. We recommend closing all running programs and watch the disk behavior: if your PC stops hanging up and slowing down you can see what program was spoiling the fun.
Most often these are torrent clients, P2P software (see more below), video editors, antiviral software and other applications meant to protect your PC from viral threats.
Cause No.4: Torrents and P2P Software
Torrents are all the rage now and many people buy an external disk to download information right there. There is no problem in that, but often the external disk slows down during this process – the download speed drops and a disk overload message is displayed.
In order to avoid this error and accelerate the disk performance you should adjust your torrent client accordingly (or any other P2P application you use): reduce the number of simultaneously downloaded torrent files to 1 or 2. In the first place, their download speed will be higher then, and in the second place, the disk load will be less intensive; make sure that files from one torrent are downloaded one after another (especially, if there are many of them).
Cause No.5: Insufficient Power, USB Ports
Some external drives nay need more power than your USB port supplies. The matter is that different disks have their own starting and operating currents: i.e. the disk will be recognized when connected to the computer and you will see the files but the work with them will be very slow.
By the way, if you connect your disk to the front panel USB port, try connecting it to USB ports in the back panel instead. Operating currents may also be insufficient when connecting your external HDD to netbooks and tablet PCs.
There are two variants how to check if that is the reason and eliminate the slow-down problem related to insufficient power supply:
- Buy a special USB connector, one end of which should be connected to two USB ports of your PC (laptop), and the other end should be connected to the USB port of your external drive;
- You can find on sale USB hubs with supplementary power. This variant is even better because you will be able to use it to connect several disks or any other devices at once.
Cause No.6: Damaged Disk
It is quite possible that your disk is nearing its end of life, especially when you observe the following, in addition to slower operation:
- your disk emits a rattling sound when connected to the PC and you try reading some data from the disk;
- your computer hangs up when addressing the disk;
- you cannot check the disk for errors because the software just freezes;
- the LED on the disk does not flash, or Windows does not recognize the disk at all (by the way, in this case your data cable may have been damaged).
An external HDD may be damaged with a slight hit (even if you think it was a slightest one). Try to remember if you happened to drop anything on the disk.
There was a case when a small book fell onto the disk from the shelf. Absolutely all right by its appearance, with no cracks or scratches, the disk made the computer freeze, emitted a rattling sound and so on. The computer came back to normal state only after the disk was disconnected from the USB port.
In conclusion to this article, we would like to note that any of the said six causes that make your external disk go slow can also result in loss of your data. That is why if your disk contains important data and you started noticing its incorrect work, we recommend that you create a backup copy of such data. It is important because there are high chances you may have to use data recovery software or address specialized service centers.
Source: https://hetmanrecovery.com/recovery_news/six-reasons-why-your-external-drive-may-get-slow.htm